
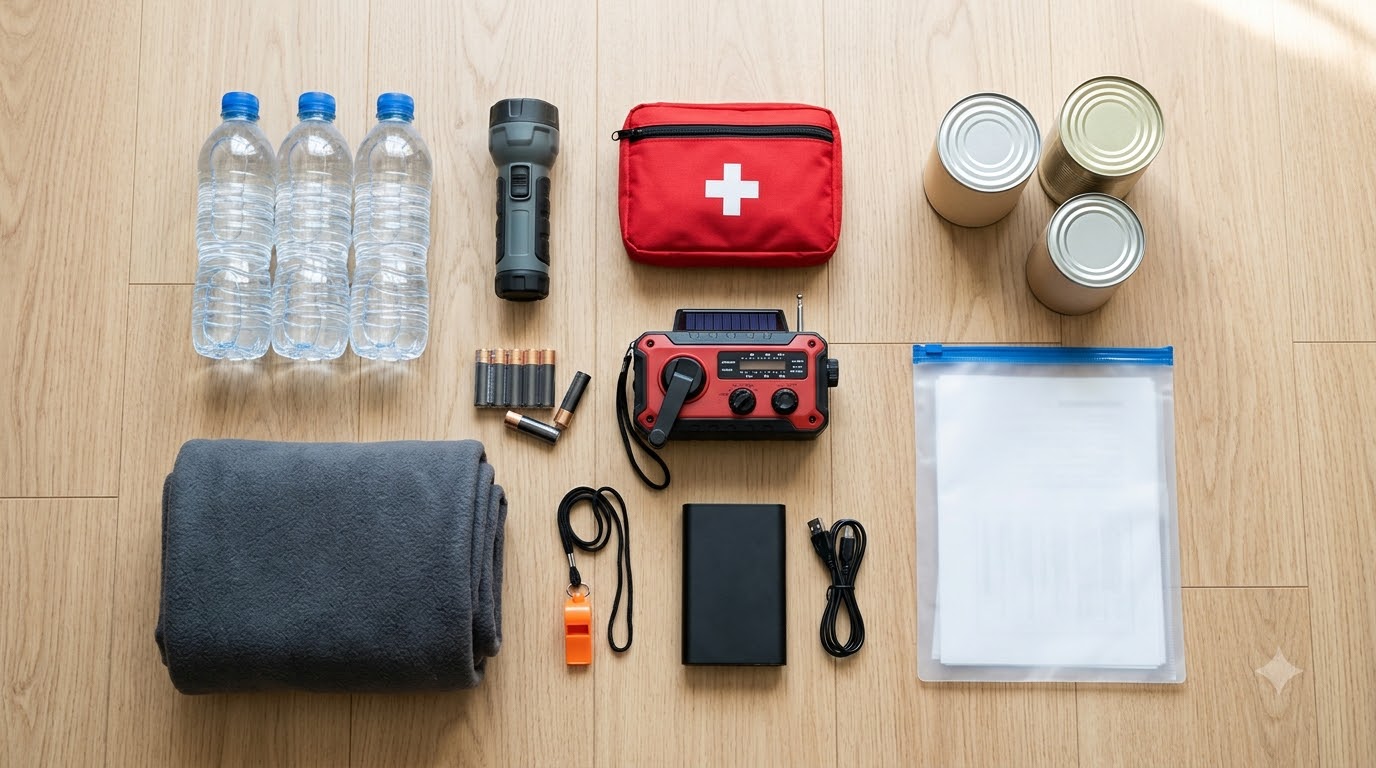
Power outages, winter storms, floods, and wildfires rarely give much warning. When one hits, the stores empty quickly and the roads may not be safe. A home emergency kit means you already have what your household needs to get through the first few days calmly. This emergency kit checklist for home walks you through exactly what to include, how much water and food to store, what most people forget, and how to keep your kit ready without spending a fortune.
The recommendations below are based on guidance from Ready.gov, the U.S. government’s preparedness program run by FEMA, plus practical experience from households who have actually used their kits. Adapt them to where you live, the risks in your area, and the people (and pets) in your home.
In this guide
Why every home needs an emergency kit
After a major disaster, emergency responders may not reach everyone right away, and basic services such as electricity, water, gas, and phone networks can be down for days. Ready.gov recommends that households be prepared to take care of themselves for at least three days, and longer in remote areas or places prone to extended outages.
A kit is not about expecting the worst. It is about removing panic from a stressful situation. When the lights go out, you do not want to be searching drawers for batteries or wondering whether there is enough drinking water. You want to open one bin and know it is all there.
There are two kinds of kits worth having:
- A stay-at-home kit: supplies to shelter in place for several days, often stored in a closet, garage, or basement.
- A go bag: a lighter, portable version you can grab in minutes if you need to evacuate.
This guide focuses on the home kit, with a short section on building a go bag at the end.
The essential emergency kit checklist for home
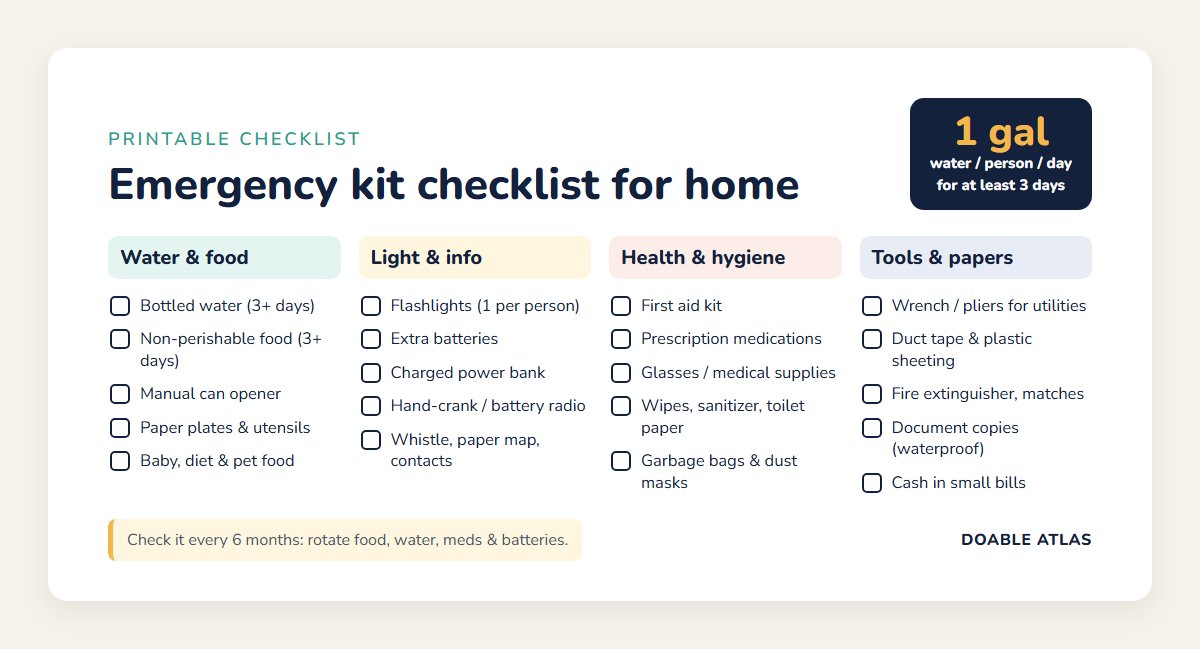
Start with these core items from our emergency kit checklist for home. They cover the basic needs that matter most in almost any emergency: water, food, light, information, first aid, and sanitation. You can print or save the checklist card below and tick items off as you gather them.
Water
- At least one gallon of water per person, per day, for at least three days. That covers drinking plus basic food preparation and hygiene.
- Extra water for pets, people who are pregnant or sick, and hot climates, where needs can be higher.
- Commercially bottled water is the easiest option. Keep it sealed and check the expiration or “best by” date.
For a family of four, the three-day minimum means at least 12 gallons. Many households choose to store a week or more, especially in areas where outages can last.
Food
- At least a three-day supply of non-perishable food per person.
- Choose foods that need no refrigeration and little or no cooking or water: canned meats and beans, canned fruit and vegetables, peanut butter, crackers, granola bars, dried fruit, nuts, and cereal.
- A manual can opener. This is one of the most forgotten items.
- Paper plates, cups, and plastic utensils, so you do not need to wash dishes with limited water.
- Special foods for babies, older adults, or anyone with dietary needs or allergies.
Tip: Stock food your household actually eats. A kit full of things nobody likes is a kit nobody rotates.
Light and power
- Flashlights, ideally one per person. LED models last much longer on a set of batteries.
- Extra batteries in the sizes your devices use.
- A portable phone charger or power bank, kept charged.
- Battery or crank-powered lanterns for lighting a room. Avoid candles where possible, since they are a fire risk.
Communication and information
- A battery-powered or hand-crank radio, ideally one that can receive NOAA Weather Radio alerts, so you can get official updates if cell service and internet go down.
- A whistle to signal for help.
- A printed list of important phone numbers and a paper map of your area. Phones can die, and memorized numbers are rare these days.
First aid and health
- A well-stocked first aid kit with bandages, gauze, adhesive tape, antiseptic wipes, gloves, tweezers, scissors, and pain relievers.
- A supply of prescription medications. Talk to your doctor or pharmacist about how to keep an emergency supply.
- Glasses or contact lenses and solution.
- Any medical supplies you rely on, such as a glucose monitor, hearing aid batteries, or mobility aids.
- Dust masks to help filter contaminated air.
Sanitation and hygiene
- Moist towelettes, hand sanitizer, and soap.
- Garbage bags and plastic ties for waste.
- Toilet paper and feminine supplies.
- A small bucket with a tight lid, which can serve as an emergency toilet if plumbing is not working.
Tools and safety
- A wrench or pliers to turn off utilities if officials instruct you to. Learn where your gas and water shutoffs are before you need them.
- A multi-tool or basic tool set.
- Duct tape and plastic sheeting, which Ready.gov recommends for sheltering in place if the air outside is contaminated.
- A fire extinguisher that everyone in the home knows how to use.
- Matches in a waterproof container.
Important documents and money
When people think of emergency supplies, they picture water and flashlights. But recovering after a disaster often depends on paperwork. Store copies of key documents in a waterproof, portable container or folder:
- Identification, such as copies of driver’s licenses and passports.
- Insurance policies (home, renters, auto, health).
- Medical information, including prescriptions and allergy lists.
- Bank account information and a list of important contacts.
- Deeds, leases, and vehicle titles.
- Birth certificates and other vital records.
Many people also keep encrypted digital copies in secure cloud storage. If your files are scattered across devices, our digital declutter checklist helps you organize them first.
Include some cash in small bills as well. When the power is out, card readers and ATMs may not work.
Items people often forget
Once the basics on your emergency kit checklist for home are covered, these additions make a big difference in comfort and safety. They are easy to overlook until you need them.
- A change of clothes and sturdy shoes for each person.
- Blankets or sleeping bags, especially if you live somewhere cold. Heating may not work during an outage.
- Rain gear and work gloves.
- Pet supplies: food, water, a leash or carrier, medications, and vaccination records.
- Baby supplies: formula, bottles, diapers, wipes, and diaper rash cream.
- Spare keys for your home and car.
- Paper and pencils for notes and messages.
- Books, cards, or games to keep kids and adults occupied without electricity.
- A small cooler and ice packs to make the most of refrigerated food in the first hours of an outage.
How much should you store? A quick planning table
Use this table alongside the emergency kit checklist for home as a starting point for a three-day kit. Scale up for a longer supply.
| Household | Water (3 days) | Food (3 days) | Flashlights |
|---|---|---|---|
| 1 adult | 3 gallons | 9 meals + snacks | 1 to 2 |
| 2 adults | 6 gallons | 18 meals + snacks | 2 |
| Family of 4 | 12 gallons | 36 meals + snacks | 4 |
| Add a medium dog | About 1 to 3 extra gallons | 3 days of pet food | n/a |
Pet water needs vary by size and climate, so check with your veterinarian if you are unsure.
How to build your kit on a budget
An emergency kit does not need to be expensive or assembled in one shopping trip. Spreading it out makes it easier on your wallet and helps you think through what you actually need.
- Shop your home first. You probably already own flashlights, a first aid kit, blankets, and tools. Gather them in one place.
- Add a little each week. Pick up a case of water one week, a few cans of food the next, then batteries. In a month or two, your kit is done.
- Buy multi-use items. A hand-crank radio that also charges a phone, or a headlamp instead of a separate flashlight, saves money and space.
- Watch for sales. Batteries and canned goods are often discounted. Just check expiration dates.
- Skip the gimmicks. Pre-made kits can be convenient, but compare their contents against this checklist. Many leave out water or include low-quality items. If you are comparing products, our guide on how to spot fake reviews can help you separate genuine feedback from marketing.
Where to store your emergency kit
The best location is one that is easy to reach, cool, dry, and known to everyone in the household.
- Use sturdy, portable containers, such as plastic bins with lids or a duffel bag, so you can move the kit if needed.
- Keep it cool and dry. Heat shortens the shelf life of food, water, and batteries. A hall closet is often better than a hot garage or attic.
- Make sure everyone knows where it is, including older children and anyone who stays with you regularly.
- Consider smaller kits for your car and workplace, since emergencies do not always happen when you are home.
If your storage space is cramped, a quick decluttering session can free up a shelf. Our guide on how to declutter your home fast shows how to clear space in an afternoon.
How to maintain your kit
A kit only helps if it still works when you open it, so keep a copy of your emergency kit checklist for home inside the bin and tick items off at each check. Build a simple maintenance routine:
- Check it every six months. Pick two easy-to-remember dates, such as when the clocks change in spring and fall.
- Rotate food and water. Use items before they expire and replace them. If you store your own tap water in clean containers, Ready.gov suggests replacing it every six months.
- Test batteries and devices. Turn on flashlights and the radio. Recharge power banks.
- Update medications and documents. Replace expired medicines and update copies after any major change, such as a new insurance policy.
- Reassess your needs each year. A new baby, a new pet, an aging parent moving in, or a move to a new climate all change what your kit should contain.
Adding a kit check to a regular routine makes it automatic. If you like planning ahead, our time blocking for beginners guide shows how to schedule recurring tasks so they actually happen.
Using your kit: the first 24 hours of a power outage
A kit is most useful when you know what to do with it. Power outages are the most common reason households open their emergency supplies, so here is a simple plan for the first day:
- Grab light first. Hand out flashlights or headlamps and set a lantern in the main room. Keep candles to a minimum.
- Get information. Turn on your battery or hand-crank radio, or check your utility’s outage updates on your phone while saving battery.
- Keep the fridge and freezer closed. According to U.S. food safety guidance, a refrigerator keeps food safe for about four hours if the door stays shut, and a full freezer holds its temperature for about 48 hours (about 24 hours if it is half full). Eat from your pantry and kit first.
- Protect your phone battery. Lower screen brightness, close unused apps, and use the power bank only when needed.
- Unplug sensitive electronics to protect them from a surge when power returns. Leave one lamp switched on so you know when the electricity is back.
- Stay safe with generators and heaters. Never run a generator, grill, or camp stove indoors or in a garage, because of the risk of carbon monoxide poisoning. The CDC advises keeping generators at least 20 feet from doors and windows. A battery-powered carbon monoxide detector is a smart addition to any kit.
- Check on others. Older neighbors, people living alone, and anyone who relies on powered medical equipment may need help.
Walking through this plan once with your household, even as a quick “practice night” with the lights off, reveals gaps in your kit faster than any list. Kids often enjoy it, and you will discover whether everyone can actually find the flashlights in the dark.
Build a go bag in 15 minutes
If you ever need to evacuate, you will not have time to pack carefully. A go bag is a smaller backpack for each person with the most important items for about 72 hours on the move:
- Water bottles and a few high-energy snacks
- A flashlight, power bank, and charging cables
- A small first aid kit and a few days of medications
- Copies of ID and important documents, plus some cash
- A change of clothes, a rain jacket, and a light blanket
- Hygiene basics: toothbrush, toothpaste, hand sanitizer, wipes
- A whistle, a paper map, and a list of contacts
Keep go bags near an exit or in your car. Pair them with a simple family emergency plan: where you will meet if you are separated, who your out-of-area contact is, and how you will communicate if phones are down.
Customize your kit for local risks
The core emergency kit checklist for home works almost everywhere, but your location should shape the details:
- Winter storms: extra blankets, warm clothing, hand warmers, and rock salt or sand for walkways.
- Hurricanes and floods: waterproof bags for electronics and documents, and a longer supply of water.
- Wildfires: well-fitting masks rated for smoke, such as N95 respirators, and a go bag ready for fast evacuation.
- Earthquakes: sturdy shoes and gloves stored near beds, and heavy items secured so they cannot fall.
- Extreme heat: extra water, electrolyte drinks, and battery-powered fans.
Your local emergency management office often publishes guidance specific to your area. It is worth a quick search.
Frequently asked questions
What are the most important items in a home emergency kit?
Water, non-perishable food, a manual can opener, a flashlight with extra batteries, a battery or hand-crank radio, a first aid kit, medications, and copies of important documents. These cover the most critical needs in almost any emergency.
How much water should I store for an emergency?
Ready.gov recommends at least one gallon per person per day for at least three days. A family of four should store a minimum of 12 gallons, and more for pets, hot climates, or a longer supply.
How long should an emergency kit last?
Plan for at least three days of supplies. Many households aim for one to two weeks, especially in areas prone to long power outages or severe weather.
How often should I check my emergency kit?
Every six months is a good rhythm. Replace expired food, water, and medications, test flashlights and radios, and update documents and contact lists.
Is it better to buy a pre-made emergency kit or build my own?
Building your own lets you choose quality items and tailor the kit to your household. Pre-made kits can be a convenient starting point, but compare them with an emergency kit checklist for home and add anything missing, especially water and medications.
Your next step
You do not need to finish your kit today. Start with one action: gather the flashlights, first aid supplies, and blankets you already own into a single bin, then add a case of water this week. Use this emergency kit checklist for home to fill the gaps over the next month, and set a reminder to check everything in six months.
Preparing a little at a time turns a big, worrying task into a simple routine. When the next storm or outage comes, you will be ready, and that peace of mind is worth every minute.